dc3000 repair

The dc3000 wasn't specifically designed for disassembly by the customer, but it's not difficult to take it apart and put back together.  

This is a procedure to correct a mis-routing of the IDE ribbon cable over some sharp fingers of a metal shield inside the case.  A puncture to the ribbon cable has been the most common source of the problem for users who cannot get the dc3000's DVD drive to show up in the device manager.  Other symptoms may include not being able to read media with the drive or getting write errors after the drive has had a chance to warm up such as at the end of writing a full disk.  It may also cause the computer to hang or problems with the drive that can come and go inexplicably if the short is intermittent.    

There is no 'warranty void if open seal' on the dc3000 and by this time, all dc3000s are out of warranty anyway so there's no risk in voiding the warranty.   The dc4000 and dc5000 units did not have this problem and if you take them apart, you will likely find a slightly different arrangement inside, namely, the multicolored cable has been replaced by a flat flexible cable and the IDE ribbon cable is bunched in the middle to prevent this from occuring.  The only tool should need is a Torx T-10 driver.  


1. First remove the right side end cap by taking out two of the screws holding it in place.  You don't have to disconnect any cabling to perform this repair.  Some of the images here have the cables disconnected to aid in showing the problem. 2. Next, take out the outermost two screws on the left side of the product.  This will allow you to remove the top and left side.   Then remove the 4 inner screws from the bottom that secure the DVD+RW drive and flop it back over.  Again, the cables have been disconnected for clarity here.  You don't have to disconnect them to perform this repair.
3.  This cable hasn't been properly folded and got pinched between the drive and the RFI shield fingers.  (Note: some IDE cables have the black ferrite collar and others may not.) 4. This is a properly folded cable that exits the shield in the opening at the back along with other cables.  You should make sure that the cable is folded in such a way that it misses any metal fingers when you reattach the drive.  NOTE:  If your are installing a new IDE cable, you will have to remove the PC board to install it as the receptacle is set back from the edge.
5.

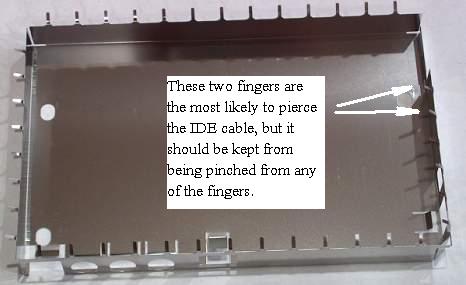
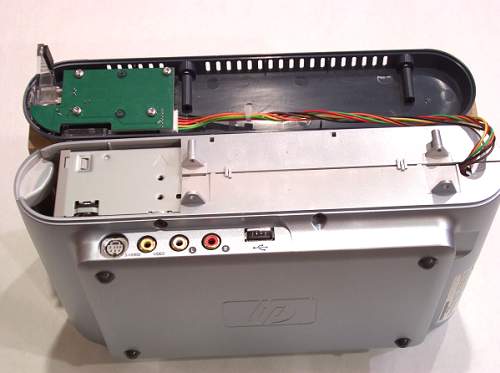
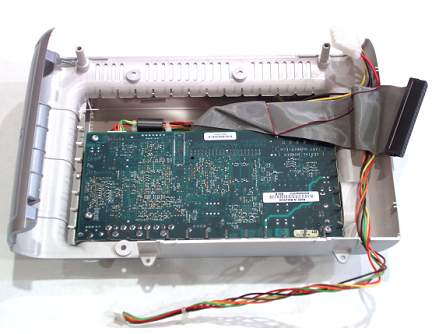
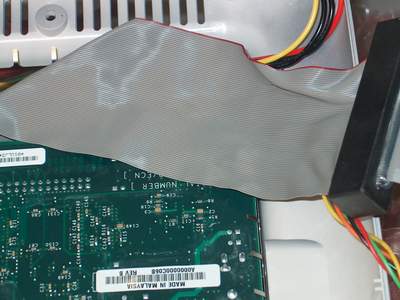
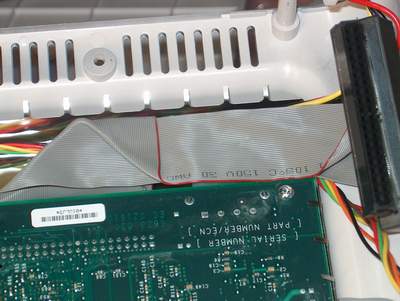
After you've routed the cable to miss the metal fingers, carefully place the drive back into position and turn the unit over and re-secure the drive with its four mounting screws.  Inspect the job you've done and make sure no cables are routed over the metal fingers.   Next, route the multicolored cable through the slot provided. 

Placed the left cap in place.  This part is labeled with 'REAR' since it looks symmetrical, but it's not.   While holding the left cap in place, place the top back on the dc3000.  Pull the door forward to prevent it from getting trapped inside.

Hold the unit together and tip it over on its left side and place the right cap in place.  Route the cable so it isn't in the way of the mounting lugs.

Attach the right cap with two screws.  Then attach the last two screws.

   
The damage to the cable may sometimes looks like a small dent to the naked eye.  This is the damage to a cable at 10x magnification.  The damage is shown here at 60x magnification

If this doesn't fix the problem you can arrange a warranty exchange by calling HP and letting them know that he drive is not working. 

This repair procedure should take about 10 minutes and is much easier than spending hours and hours struggling with various software approaches.