The HP Media Vault’s primary system hard disk uses the Serial ATA (SATA) interface. The internal expansion bay will accommodate a second SATA disk. (The media vault does not support adding Integrated Drive Electronics (IDE) disks.)
You cannot remove or add a hard disk to the media vault while it is powered on and running.
To add a SATA disk into the expansion slot:
Power down the media vault by pressing the power button on the front of the media vault and wait until it completely shuts down.
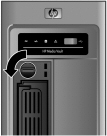
Open the front left door of the media vault.
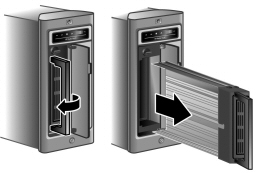
Turn the security knob on the hard drive tray counter-clockwise.
Lift the drive tray handle out and gently pull the hard drive tray out of the expansion bay.
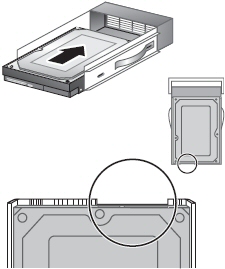
Slide the hard drive into the tray. Ensure that the hard drive connector aligns to the back of the tray.
Use a screwdriver to attach the four screws, which secures the SATA drive to the tray.
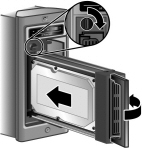
Slide the tray with the inserted hard drive into the expansion bay.
Turn the security knob clockwise to secure the drive tray into place.
Power up the system.
You can now use the additional hard drive. (For information on formatting the hard disk, see Format a disk.)
To remove an internal expansion:
Power down the media vault by pressing the power button on the front of the unit and wait until it completely shuts off.
Turn the security knob counter-clockwise.
Lift the drive tray handle out and gently pull the hard drive tray out of the expansion bay.
Use a screwdriver to unscrew the four screws.
Remove the hard drive from the tray. To prevent losing the tray, insert the empty tray back into the media vault.
Power the system back up to use the single internal drive.
Removing hard disks can cause unexpected and undesirable behaviors. If the media vault has volumes that span across multiple disks, removing any one of the disks will make the whole volume unusable (at least until the disk is reconnected).